
Just because we’re in the 21st-century and digital photos are the norm doesn’t mean that physical photos are dead. There are still plenty of users who actually like having a physical photo. Well, thanks to 21st-century technology you can have that physical photo printed directly from your smartphone in seconds. That’s where the HP Sprocket Studio comes into play.
Sure, there are printing services offered by Walgreens, CVS, Shutterfly, and others, but the tech inside the HP Sprocket Studio is pretty comparable to those. Not only that, but the cost per print is also comparable and could be worth it if you’re printing physical photos frequently. Read on for the full review of the HP Sprocket Studio.
Specifications
The HP Sprocket Studio has the following features and specifications:
- Functions: Photo Printing
- Resolution (black): 300dpi (K produced is a composite of CMY)
- Resolution (color): 300 dpi
- Print Technology: Dye-sublimation Technology
- LED Display: Job color/Personal color: printing; (light blue default) Idle; Slow blink red; Out of paper/no cartridge/no tray/out of supply; Fast blink red: Paper jam
- Print Cartridges: 1 (CMY + Overcoat) HP Sprocket Studio Cartridges and Photo Paper-80 sht/3.9 x 5.8 in (100 x 148 mm) 4KK83A
- Paper Trays: 1 with 20-sheet capacity
- Connectivity: Bluetooth 5.0
- Minimum System Requirements: Android: 5.0 and above; iOS: compatible with iPhone X, iPhone 8, iPhone 8 Plus, iPhone 7, iPhone 7 Plus, iPhone SE, iPhone 6s, iPhone, 6s Plus, iPhone 6, iPhone 6 Plus, iPhone 5s, iPhone 5c, iPhone 5, iPad (6th generation), iPad Pro, 12.9-inch (2nd generation), iPad Pro 10.5-inch, iPad (5th generation), iPad Pro 9.7-inch, iPad, Pro 12.9-inch (1st generation), iPad Air 2, iPad Air, iPad mini 2, iPad mini 3, iPad mini 4, iPad (4th generation), iPod touch (6th generation)
- Printer Management: Sprocket App
- Power: AC input voltage 100-240 Vac (+/- 10% tolerance). Input frequency 50-60 Hz (+/- 3 Hz tolerance). Maximum input current 1.5 Aac; Power bank (External and optional): Power bank output: 21 Vdc-24 Vdc/1.2A, 5 Vdc/2 A, 3200 mAh
- Dimensions: 6.65 x 10.75 x 2.68 in
- Weight: 2.05 lbs
What’s In The Box
- HP Sprocket Studio
- Power Supply and cable
- HP Sprocket Studio Ink Cartridge
- HP Sprocket Studio Photo Paper (10-pack)
- Setup Guide
- Warranty and Documentation
Design
I’m going to kick off the design section with the one thing that bugs me about the HP Sprocket Studio and that is the power supply. In short, the thing is massive. It’s literally the size of a large laptop power supply and feels antiquated compared to the HP Sprocket Studio itself. That being said, the power supply is most likely not going to be seen but it would have been nice to have a slimmer footprint.
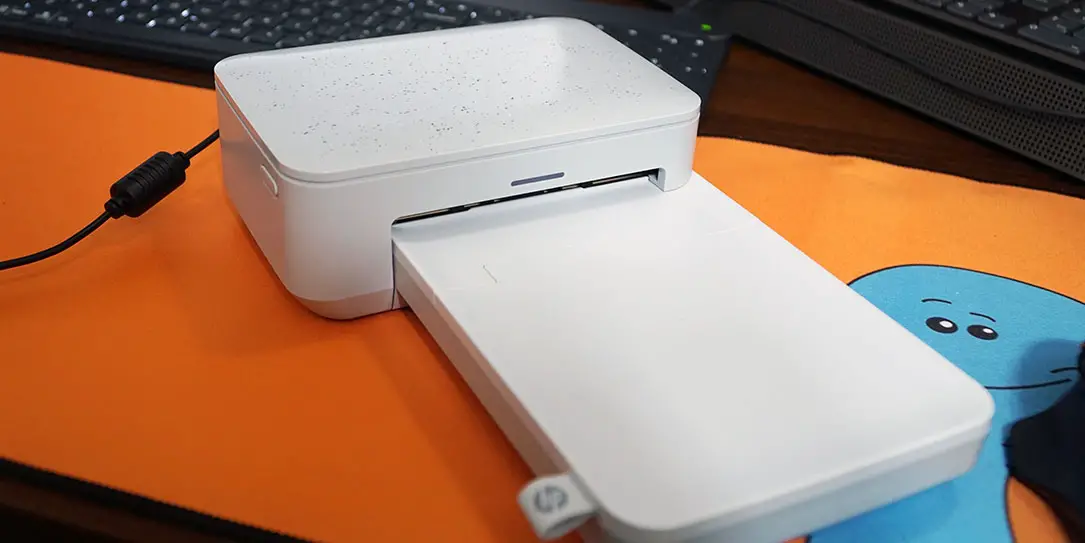
With that out of the way, the rest of the HP Sprocket Studio is actually visually appealing. The whole unit is made of high-quality plastics with the top section having a speckled texture that looks rather nice.
The rear of the unit is where the power port is located and a slot where the paper comes out and gets fed back in for ink application. The right side of the HP Sprocket Studio has a door for your printer ribbon which just flips down and you can only slip the ribbon in one way.
The left side of the unit has the power button and the longer portion of the unit is where the paper gets loaded. The LED light is located on the front (see specifications for light color guide). The bottom has nice rubber feet along with a lock button. The whole unit is very lightweight and isn’t overly large, so it should fit on a desk just fine.
You do need to have some space open behind the HP Sprocket Studio when printing. This is to allow the paper to come out and be fed back in without being obstructed.
Overall, the design of the unit itself is attractive. It’s also well built and feels high-quality. The controls are simple, and I feel like HP took a less-is-more design attitude here.

Ease of Use/Setup
Unpacking the HP Sprocket Studio is simple and getting everything set up is a breeze.
The first thing you should do is head over to the App Store or Play Store and download the HP Sprocket app to your iPhone or Android device. This printer will only work with your mobile device and not intended for desktop use.
Once you have the app installed, you can plug the HP Sprocket Studio in and press the side power button to fire it up. Open up the app and follow the instructions within the app.
The app will have you connect to it via Bluetooth, it will instruct you to put the ribbon in and will instruct you to put the photo paper in as well. Once you have gone through all of the setups within the app, you’ll be able to choose photos from your gallery or take new photos which you can then print on the Sprocket Studio.

We’ve supplied screenshots below of the step-by-step that you will actually see in the app. It takes about 10-minutes to get everything set up before you can start playing with the app and printing photos.
Overall, this is very easy to setup. It should only take about 10-minutes and for some even less time. Everything is done through the app, which is pretty intuitive and easy to follow along.
HP Sprocket Studio App Gallery


Software/App
The HP Sprocket Studio app is not unlike most other camera and photo apps already out there. The major difference is that it connects to the Sprocket directly over Bluetooth allowing you to print your photos.
The app has plenty of features including the ability to connect to Instagram, Facebook, Google Photos, or just using your device’s Gallery app. For our testing, I simply used the Gallery app as I had plenty of photos in my camera roll that were great.
Once you have a photo chosen for printing, you can go into the app and crop it or play with the colors. You can also add text, stickers, and other fun things. Once you’re all done editing and doctoring up the photo as you like, you just hit print and the photo will be sent to the HP Sprocket Studio over Bluetooth 5.0.
That is basically all there is to printing from your Gallery app. The same would apply to your social media photos. Just pick a photo from Facebook or Instagram, edit it the way you like in the Sprocket app, and hit the print button.

The app also has a feature called Reveal. When you print a photo or video frame with Reveal turned on, the photo prints with a concealed watermark. This watermark allows you to reveal additional content when viewing your photos through the HP sprocket app camera.
The Reveal feature embeds additional content, such as related videos and photos, Wikipedia facts, and the Google Earth Street View. Just jump back into the app and tap the Reveal button, point it at the photo with the hidden watermark and Reveal will give you the info it can find.
Overall, the app is intuitive and easy to use. It’s set up in a way that is familiar to pretty much everyone so there’s nearly no learning curve.
Performance
The HP Sprocket Studio performs very well for a photo printer. It spits out your photos in a timely manner, it might take a bit longer if you’ve sent multiple files into the queue, but that’s to be expected.
The colors on the photos are great. Of course, it will matter what photo you choose from your gallery or social media. If you pick something that’s dark, well, then it will print dark. So be sure you pick well lit and colorful photos and you shouldn’t have any issues.
Overall, the performance of this printer is great. I didn’t have any issues at all, no jams, no bad prints, no slow performance.

Price/Value
So this is where you will have to decide if the HP Sprocket Studio is worth it for you. The one time cost of the machine is US$149.99 and it comes with 10-blank prints and an ink cartridge. To restock the machine you’re looking at buying the Ink and 4 x 6-inch photo paper bundle for US$34.99. That’s basically 43-cents per print which is pretty comparable to most drug stores and the like.
The US$34.99 bundle gives you those 80-sheets and enough ink to print 80-sheets. The initial investment on the machine is what you’ll really have to decide is worth it or not. I think it is well worth it if you’re a consistent printer. If you’re someone who is printing dozens of photos a month then the value is certainly there. If you’re printing a dozen photos a year, well, then you should rethink it.
Overall, the price is fair and the value is there for those who are going to use the HP Sprocket Studio on a daily basis.
Wrap Up
Physical photos are still a thing, go figure. For those who can’t get enough of them, the HP Sprocket Studio is a great product. The initial investment will pay for itself in no time and the cost per print is comparable to places like Walgreens and Shutterfly. Plus, you get the satisfaction of having your prints right away.
*We received a review unit of the HP Sprocket Studio for the purposes of this review.
Last Updated on February 3, 2021.