
Depending how old you are, and at the risk of dating myself, you may remember the View-Masters of old. In case you’ve never seen or heard of it before, the original View-Master whisked kids away through the use of discs that had photos on them. You could get discs for space, destinations, nature, cartoons, you name it and you could probably get it. Fast forward to 2015 and the return of a classic toy. In conjunction with Google, Mattel has turned it into a virtual reality device that works with a smartphone to transport your kids to different places. So how does it stand up to the test of time? Read on in our View-Master review to find out!
Specifications
Before we get too far ahead of ourselves, the View-Master Virtual Reality Viewer, as Mattel calls it, requires the use of a compatible smartphone. Pretty much any smartphone with a gyroscope should work just fine, and the following compatible smartphones are listed on the Starter Pack:
- iPhone 5s/6/6 Plus
- iPhone 5/5c (some View-Master VR apps may not be optimized for these models)
- Samsung Galaxy S 4/5/6
- Samsung Galaxy Note 4
- Motorola Moto X (2014)
- Motorola Droid Turbo
- LG G3/G4
- HTC One
- Nexus 5/6
As I mentioned above, pretty much any smartphone with a gyroscope should work. I tested the View-Master VR out with the new Moto X Play but as it doesn’t have a gyroscope the experience was pretty abysmal to say the least.
What’s in the Box
With the View-Master Virtual Reality Starter Pack, you get:
- 1 Viewer
- 1 Preview Reel
- 1 Phone Adapter (for iPhone 5/5c/5s)
- Instructions
Design
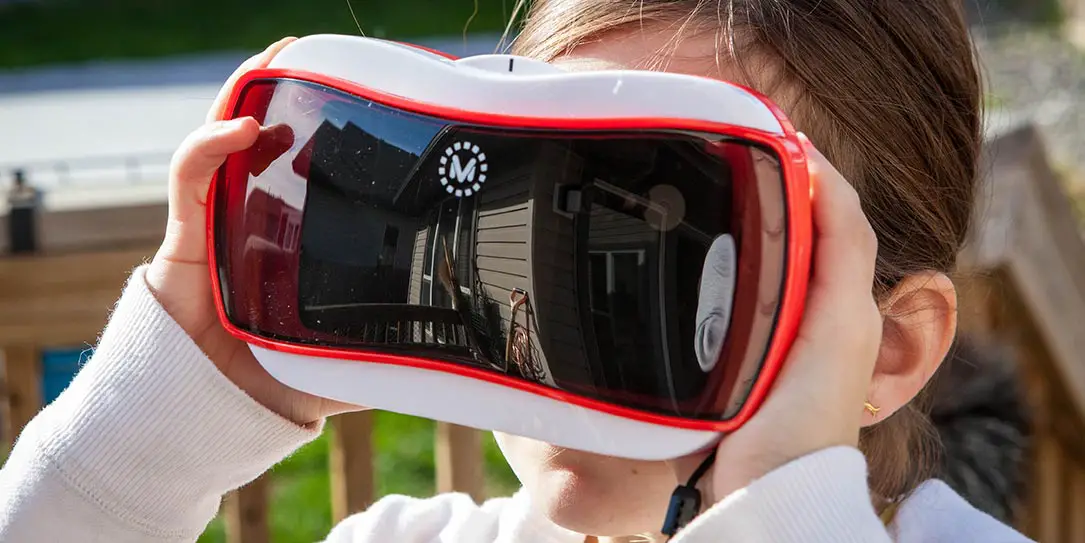
There’s no doubt about it, this is a View-Master through and through. Mattel did a great job updating the View-Master Virtual Reality viewer while retaining the look and feel of the old school View-Master. Even the “reels” emulate the style of the old reel inserts. For those of you familiar with the Google Cardboard viewer, you’ll probably think of this as a glorified version of that.
Holding the viewer as if you were using it, you’ll find a rubber piece which is molded to the shape of your head. This piece contains the two viewing lenses. Just in front of that on the right hand side you’ll find the lever, again reminiscent of the original View-Master lever which rotated the disc to the next image when pressed. The front of the viewer contains a smoked plastic piece, and the top features the latch in which you push up to open the front and access the area where you place your smartphone. The latch even has a round piece in front of it that is purely cosmetic but mimics the look of the original disc reels. On the left side is a wrist strap.
Once opened, the inside front of the viewer houses the latches under which you slide your phone into (with the phone adapter attached to one of the long edges of your iPhone 5, 5c, or 5s), and a QR code that you can use to configure your phone for use with the viewer and the Google Cardboard app.
The entire View-Master VR is constructed of plastic, and it definitely feels like a toy but is pretty sturdy once the latch is closed. The eyepiece fits pretty comfortably, even around an adult head, and the only issue is that it isn’t very conducive to those who wear glasses. However, when used without glasses the View-Master VR is in focus so they’re not needed and you can get away without them while using the device.


Software
The View-Master Starter Pack comes with a preview reel, and you can also get three more sets called Experience Packs, one each for Space, Wildlife, and Destinations. We were lucky enough to get each of the three sets to test out with the View-Master VR unit.
Each Experience Pack requires you to download the companion app from the Google Play or Apple App Stores. The apps are between 212MB to 295MB each, so you’ll need just under 1GB if you are installing them all. The apps can also be downloaded and used with Google Cardboard or other compatible VR devices without needing to buy the Experience Pack but you’ll need to pay to unlock the content through an in-app purchase.
Space
The Space Experience Pack contains three sections: Solar System, Spacecraft, and Star Map. The Solar System section allows you to travel to all the planets within our solar system. You can examine them, rotate them, and find out interesting facts about each one and their moons. While viewing the Spacecraft section, you can examine 3D models of various spacecraft that have been used in space exploration to date. And finally, the Star Map lets you learn about constellations and the night sky. One of the cool features about the Star Map is if you have GPS location enabled on your smartphone, you can see the stars and constellations that are at your location.
Wildlife
The Wildlife Experience Pack was developed with National Geographic and again contains three sections: the Savanna, Amazon, and Outback. With this pack, you can visit the African savanna, the jungles of the Amazon, and the blistering Australian Outback. Each scene allows you to explore in full panoramic view and spot various animals which you can photograph, learn more about through videos, or read facts about them from the National Geographic notes.
Destinations
The third, and final pack that is currently available, is the Destinations Experience Pack. With this pack you travel to Liberty Island and the Statue of Liberty in New York, the ancient Mayan city of Chichen Itza, or travel to the UK and have an inside look at the Tower of London or cross the Tower Bridge. The Destinations Experience Pack is composed of 360 degree images and allows you to click through to different areas. It would have been fun to see some 360 degree video in this one for sure.
Google Cardboard and Other VR Apps
The View-Master is also compatible with the Google Cardboard app, so you’ll probably want to download that as well to extend the usability and experience with it. Through the Google Cardboard app you can access YouTube 360 video and other areas of Google Cardboard with no problems, and the app ran fine. You can also search the Google Play and Apple App Stores for other VR experiences which should work fine as well.
Ease of Use
After installing and launching one of the Experience Packs, you activate it by selecting “I have an Experience Pack” from the main menu and the first time you use it you are prompted to hold your Pass Card over the outline on your phone screen. I had better luck holding it lengthwise instead of the way the outlines suggested and it took a bit of playing to get the Pass Card to register, but once it does you don’t have to use it again for that device.

The app will then tell you to insert your device into the View-Master. You will have to remove any case you might have on it in order for it to fit. As mentioned in the design section, you insert your smartphone by opening the front of the Viewer by pulling up on the clasp on the top, then inserting your smartphone into the guides. A line will appear on your screen which you will need to align with the line on the Viewer itself. After you’ve aligned your phone, close up the front of the Viewer and hold it up to your face. You will be prompted to look at one of the reels from the pack to access the content. A distance of about 10″ is suggested, one thing that is not mentioned but is critical is to make sure you are in a VERY well lit area otherwise it has difficulties registering. It is possible that your results may vary depending on what smartphone you have, we tested the View-Master with a Nexus 5. Once your device registers the reel you’ll see a virtual image that corresponds to the section you are accessing. Press the lever and away you go.


.")
Each Experience Pack is pretty decent with the cues it offers, once you see one of these cues, press the lever and it will take a photo, launch a video, grab onto the object so you can rotate it, and so on. It really is a true 360 degree experience, so be sure to look all around as well as up and down. When you look down, you’ll see the menu in a ring on the floor that allows you to go back, exit to the main menu, and access other functionality depending on the reel.
If you don’t have the Experience Pack, you can purchase the content through the app. As well, once you register it with the Pass Card, you can select “I do not have the Experience Reels” and you will still be prompted to insert and align your device. Once your device is inserted you can then look around and select an icon for the section that you want to view. While the reels add a level of tactility to the Viewer, if you plan on going between the reels it is faster to use the app without the reels.
Performance
Performance will depend on your device, as I mentioned earlier this does not perform well at all on a device that does not have a gyroscope. The apps all loaded fine and ran perfectly on a Nexus 5 so you don’t need the latest and greatest phone to run the apps. One thing to note though, I did notice that the phone did heat up a little bit when used for extended periods of time so you might want to keep that in mind when using it with the Viewer which pretty much contains your phone within a vent-less box.
Battery Life
The Viewer itself doesn’t have a battery, and during our testing half an hour used up about 15-20% battery depending on what Experience Pack and section you are viewing.
Price/Value
The View-Master Virtual Reality Starter Pack has an MSRP of $29.99USD. Each Experience Pack is sold separately with an MSRP of $14.99USD for each pack. The Experience Packs run about the same on the Google Play store if you decide to just purchase the app without wanting the reels that come with the Experience Packs. While the content on each Experience Pack is limited, there is enough in each one, especially the Wildlife and Space Experience Packs, to keep your kids entertained and learning for a few hours. My daughter spent a lot of time using the Wildlife pack and exploring the Solar System with the Space pack while my son was more interested in all the sections in the Space pack.

Wrap Up
Sure there are cheaper, and even free, alternatives to the Viewer, but holding it and using it not only for the Experience Packs but for other VR apps and YouTube 360 video definitely brought back that nostalgic feeling of using an updated version of a toy from years past. The Experience Packs offer a lot of educational information and present it in a fun learning experience that your kids are sure to love. If you’re only after one or two packs, I’d recommend the Space or Wildlife Experience Packs as the better choices with the Destinations Experience Pack pulling up a distant third.
[rwp-review id=”0″]*We were sent a demo unit of the View-Master Virtual Reality Starter Pack, Space Experience Pack, Wildlife Experience Pack, and Destinations Experience Pack for the purposes of this review.
Last Updated on November 27, 2018.


Comments are closed.