 So you’ve made the choice to purchase a computer but need portability. A laptop is an obvious choice but you also want to be able to game. Sure there are some pretty slick and specced out gaming laptops but you don’t want to have to replace it in a year or two because your video card can’t handle the latest games. That’s where external GPUs (eGPUs) come into play. Our Razer Core V2 review takes a look at one of Razer’s current eGPU offerings which allows you to beef up your laptop’s graphics via a USB-C Thunderbolt connection.
Specifications
The Razer Core V2 has the following features and specifications:
- Thunderbolt™ 3 External Graphics Enclosure
- Supports PCIe desktop graphics cards
- Plug and play with compatible GPU
- USB 3.0 ports and Ethernet
- Powered by Razer Chroma™
- Connection to PC: Thunderbolt™ 3 using included 40Gbps cable
- Compatible Razer Blade laptops: Razer Blade Stealth and Razer Blade notebooks equipped with Thunderbolt™ 3
- Razer Core V2 max inner dimensions: 11.81 x 5.71 x 1.69″ (300 x 145 x 43mm) NOTE: Height measured from top of PCIe connector to the bottom of the locking pin ramps
- GPU Support (Desktop graphics card not included)
- GPU Type: Single double-wide, full-length, PCI-Express x16 graphics card
- GPU Max Power Support: 375 Watts
- Plug and Play compatible graphics chipsets: Graphics cards use varied designs based around a common graphics chip. Please ensure the GPU selected meets all size, power, and additional requirements.
- Qualified NVIDIA® GeForce® graphics chipsets
- NVIDIA® GeForce® GTX 1080 Ti
- NVIDIA® GeForce® GTX 1080
- NVIDIA® GeForce® GTX 1070
- NVIDIA® GeForce® GTX 1060
- NVIDIA® GeForce® GTX Titan X
- NVIDIA® GeForce® GTX Titan Xp
- NVIDIA® GeForce® GTX 980 Ti
- NVIDIA® GeForce® GTX 980
- NVIDIA® GeForce® GTX 970
- NVIDIA® GeForce® GTX 960
- NVIDIA® GeForce® GTX 950
- NVIDIA® GeForce® GTX 750 Ti
- NVIDIA® GeForce® GTX 750
- Qualified NVIDIA® Quadro® graphics chipsets
- NVIDIA® Quadro® P4000
- NVIDIA® Quadro® P5000
- NVIDIA® Quadro® P6000
- NVIDIA® Quadro® GP100
- Qualified AMD Radeon™ graphics chipsets
- AMD Radeon™ RX 500 Series
- AMD Radeon™ RX 400 Series
- AMD Radeon™ R9 Fury
- AMD Radeon™ R9 Nano
- AMD Radeon™ R9 300 Series
- AMD Radeon™ R9 290X
- AMD Radeon™ R9 290
- AMD Radeon™ R9 285
- Graphics Output: Based on capabilities of installed graphics
- Input & Output
- USB 3.0 X 4
- Gigabit Ethernet 10/100/1000
- Thunderbolt™ 3 (for connection to PC)
- Lighting: Razer Chroma – 2 Zones
- PC System Requirements: Windows® 10 64bit with Thunderbolt 3 port
- Internal Power Supply: 500 Watts
- Included Cables: Power Cable, Thunderbolt 3 cable
- Approx. Size: 4.13 x 13.38 x 8.6″ (104.9 x 339.9 x 218.4mm)
- Weight: 7.7lbs (3.5 kg)
What’s in the box
- Razer Core v2 eGPU enclosure
- USB-C Thunderbolt cable
- Power cable

Design
The Razer Core V2 eGPU is quite a beast. It stands just over 8 1/2-inches in height, over 4-inches wide, and is just under 13 1/2-inches in length. It is also very heavy, coming in at about 7.7lbs (3.5kg) without a video card installed. Constructed of CNC-machined aluminum, it definitely has a hefty and solid feel to it.
The Core V2 has rounded corners on the top and bottom edges. There are fins on the top, bottom, and front of the eGPU as well as a mesh grille on the left side for cooling. The bottom also has a pair of rubber pads for added grip and to protect your desk or table from scratches. The Razer Snake logo is stamped on the right side but doesn’t light up in any manner, as is typical for many Razer products.

The back of the enclosure is where you’ll find your ports which include the power receptacle, USB-C Thunderbolt port, four USB-A 3.0 ports, and an RJ45 Gigabit Ethernet port. There is also a locking handle here which is used to pull the outer shell off the eGPU to access the video card slot.

When looking at the internal video card enclosure from the handle, the 500W power supply resides on the left-hand side of the eGPU while the PCIe slot sits on the right side. Located on the left side under the power supply is a locking lever which needs to be pushed in when removing the video card. There are also two 6/8 pin internal power connectors which supply power to your video card as required. Finally, there is a screw and screw hole near the front of the enclosure to further secure your video card when inserted.

The Razer Core V2 also supports Razer Chrome lighting. There are two zones, the front under the front fins, and internal which bleeds out through the side grille. We’ll discuss this briefly in the software section but it allows you to set your Chroma lighting and sync it with other Razer products.
The Core V2 eGPU definitely has a solid look to it and it won’t look out of place on or under your desk. It’s definitely something you’re not going to be wanting to haul around all over the place due to its weight. It lends itself to being more of a setup and leave it device allowing you to take your laptop on the go when you need it and connecting it to the eGPU when you arrive back at the office or home for beefed up graphics for productivity or gaming.

Installation
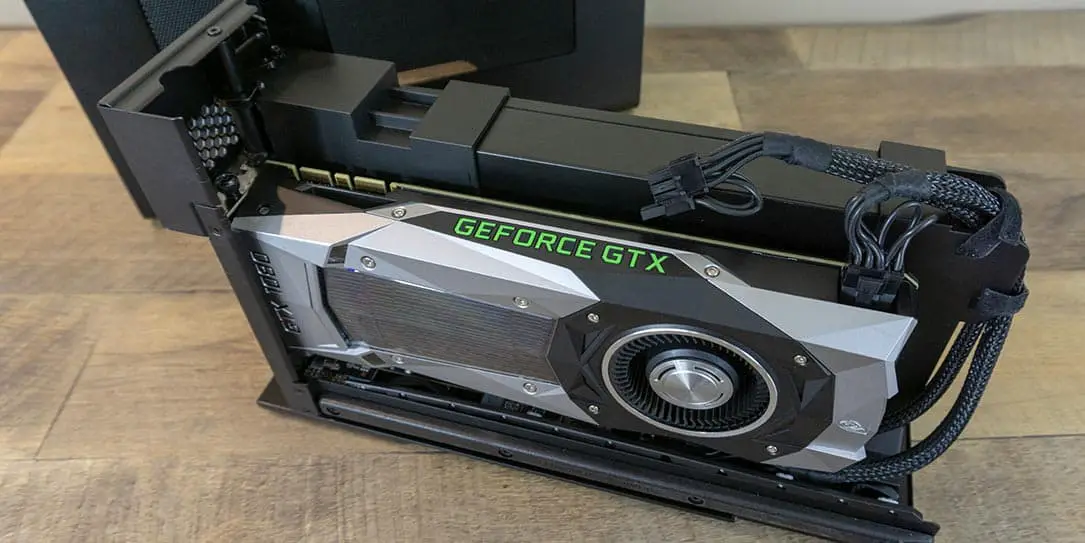
As far as initial installation, the Razer Core V2 is pretty straightforward. Grab the handle on the back of the enclosure and flip it 90-degrees until it sticks straight out. Pull it back and the internal portion of the system slides out easily. Next, seat your video card in the PCIe slot, screw it in place, and plug in the required power connectors based on your video card’s requirements. Once done, slide the unit back into the outer sleeve and flip the handle back in place to lock it. The physical installation is pretty straightforward and, as we’ll discuss below, you want to make sure that the video card is properly and fully seated.

Keep in mind that your video card will need to be smaller than the internal dimensions of 11.81 x 5.71 x 1.69″ in order for you to install it and close the case for use.

Setup
Next, plug in the Core V2 and connect it to your laptop via the included USB-C Thunderbolt cable (which is fairly long and should suit most desk setups). Once plugged in and connected, your computer should detect and set up your external video card. At this point, you will likely have to install your video card drivers whether it be NVIDIA or AMD.
In the case that the Core V2 isn’t detected on your system, you’ll need to check a few things. For starters, before even thinking about purchasing an eGPU enclosure, you’ll want to verify that your USB-C port is, in fact, a Thunderbolt 3 port. Next, you’ll need to install the Thunderbolt software if it already isn’t installed on your system. Once it is installed, you should see the Razer Core V2 listed in the Thunderbolt software.

At this point, you should also see a new icon in your notification tray for the NVIDIA GPU activity (if using NVIDIA graphics cards) which shows that the Core V2 is connected. It also shows what applications or games are currently using the Core V2 instead of your internal graphics.

While the setup is pretty straightforward as well, you may run into some minor issues or have to take some extra steps in order to set up the Core V2. On the Razer Blade Stealth, setup was pretty much automatic. On our test/reference machine — a Lenovo Y920 gaming laptop — set up was pretty automatic as well. When testing it on an older Acer which did have a Thunderbolt 3 port, we were unable to get the system to recognize the Core V2 at all. Depending on your system, you may want to do some research for your particular model to see if it is compatible with eGPUs and, especially, the Core V2 before purchasing.
Software
Like the Razer Blade Stealth, the Razer Core V2 uses Razer Synapse 2 for its Chroma lighting settings. As mentioned above, there are two zones that you can set with Chrome lighting. You can either set them separately or sync them together, as well as sync them with other Razer devices that are still using the older version of Synapse and not the new Synapse 3 Beta. Fortunately, in our testing/review scenario, this allowed us to sync the lighting on the Razer Blade Stealth and the Core V2 for a synchronous lighting workspace. The app itself is straightforward and simple in this case and there’s not much to it.

Like we noted with the Razer Blade Stealth, it’d be nice to see the Core V2 supported by the new Razer Synapse 3 Beta for more synchronization with newer Razer products.
Performance
The section you’ve no doubt been waiting for or skipped right to. Performance. Before we begin, our two main test machines were the Razer Blade Stealth and a Lenovo Legion Y920 gaming laptop. While there are some differences between the two, including video cards, you’ll still be able to get a solid idea of the Core V2’s performance from our comparison tests.
- Razer Blade Stealth: 8th Gen Intel Core i7-8500U Processor, 16GB LPDDR3-1866MHz RAM, Intel UHD 620 graphics
- Lenovo Legion Y920: 7th Gen Intel Core i7-7820HK Processor, 16GB DDR4 RAM, NVIDIA GeForce GTX 1070 (8GB VRAM)
- Razer Core V2: NVIDIA GeForce GTX 1080 (8GB VRAM)
- Games tested: Heroes of the Storm, Forza Motorsport 7
We ran both games on both systems without the Core V2 attached as a reference point:
- Razer Blade Stealth (without Core V2)
- Heroes of the Storm: 1080p, High settings, 20fps avg; 1080p, Medium settings, 40fps avg
- Forza Motorsport 7: 1080p, Very Low settings, 20-30fps
- Lenovo Legion Y920 (without Core V2)
- Heroes of the Storm: 4K, Extreme settings, 110-128fps
- Forza Motorsport 7: 4K, Ultra settings, 50fps; 4K, High settings, 60fps; 1080p, Ultra settings, 60fps
Our initial testing results were dismal, to say the least. While the frame rate started off great, it tanked quickly on both systems:
- Razer Blade Stealth (with Core V2)
- Heroes of the Storm: 3200×1800, Extreme settings, started off at 150+ fps, slowly degraded to 15fps
- Forza Motorsport 7: 4K, Ultra settings, 20-30fps; 2560×1440, Ultra settings, 27-32fps; 1080p, Ultra, 45-55fps — in all cases these initial framerates slowly tanked to below 10fps
- Lenovo Legion Y920 (with Core V2)
- Heroes of the Storm: 4K, Extreme settings, tanked to 15-25fps
- Forza Motorsport 7: 4K, Ultra settings, 60fps; slowly tanked to 19fps after the third lap of a short race
So, as you can see, our initial outlook wasn’t that great. After following up with Razer about the issue, they suggested reseating the video card, using the other internal power connector, and uninstalling/reinstalling the NVIDIA graphics drivers. Once we did that, our framerates definitely improved:
- Razer Blade Stealth (with Core V2)
- Heroes of the Storm: 3200×1800, Extreme settings, started off at 100fps, dripped down to 35fps avg; 1080p, Extreme settings, started at 120fps, averaged 60-80fps with peaks of 130fps as the match progressed
- Forza Motorsport 7: 4K, Ultra settings, 20fps; 1080p, Ultra, 52-71fps average, dropped as low as 34fps on occasion
- Lenovo Legion Y920 (with Core V2)
- Heroes of the Storm: 1080p, Extreme settings, 115fps average
- Forza Motorsport 7: 1080p, Ultra settings, 60fps
So, as you can see, the framerates definitely improved, however, in both cases are still below the Lenovo Y920 without the Core V2 attached. After doing a bit of reading, I tried the same tests with an external 4K monitor attached to cut down on some of the bandwidth being used by the USB-C Thunderbolt cable.
- Razer Blade Stealth (with Core V2 and 4K external monitor)
- Heroes of the Storm: 4K, Extreme settings, started off at 35fps, dropped down to 27fps avg; 1080p, Extreme settings, started at 130fps, averaged 65fps with peaks of 90fps as the match progressed
- Forza Motorsport 7: 4K, Ultra settings, 25fps; 1080p, Ultra, 27-61fps “wildly” fluctuated
- Lenovo Legion Y920 (with Core V2 and 4K external monitor)
- Heroes of the Storm: 4K, Extreme settings, 115-120fps average, 150fps max
- Forza Motorsport 7: 4K, Ultra settings, 55fps average
So while the external monitor provided better framerates in most cases, it wasn’t that much of a difference and was still below our Lenovo Y920 benchmark. When following up with Razer again, while they didn’t have internal benchmarks for either game, they did mention that the results we were seeing weren’t that abnormal. In fact, Razer mentioned that “on most benchmarks, we see about a 20-30 FPS decrease due to the bandwidth limitations of the Thunderbolt 3 port.” Razer also mentioned that the key purpose of the Core V2 was to turn a non-gaming laptop into a gaming laptop as well as future-proofing for video card upgrades — which it does, just not as much as one would expect from a card like the GeForce GTX 1080.

One area that I did find the Core V2 really made a difference in was processing time in CPU-intensive apps like Adobe Photoshop and Adobe Premiere.
Another issue I discovered is that Virtual Reality would (presumably) not work with the Razer Core V2 and an NVIDIA GeForce GTX 1080 installed. For some reason, even though the 1080 was identified under the My Rig section, the Virtual Reality settings were looking for a Notebook GeForce GTX 1060 or higher. Unfortunately, I don’t have a VR setup to test it out so this may just be a reporting issue and not an actual functionality issue.
Depending on how hard you’re pushing the video card, the Core V2 can get loud but not overly loud to be distracting. If you are using it for gaming, chances are you have decent speakers or headset so the louder fan sounds shouldn’t be an issue.
Another thing to note is that as soon as you unplug the Razer Core V2 from your laptop, it will power down. To power it back up, simply reconnect it to your laptop via the USB-C Thunderbolt cable.
Price/Value
With an MSRP of $499.99USD, the Razer Core V2 isn’t exactly cheap. The newer Razer Core X is slightly cheaper at $299.99USD but we haven’t tested it to see what the major differences are. You’ll also have to keep in mind that this doesn’t include a video card (as tested, our video card retails for around $549USD) so you could easily be at the $1000 mark above the cost of your laptop before you have a suitable setup for gaming.

Wrap-up
While the Razer Core V2 eGPU does indeed boost your laptop’s graphics capabilities and turns it into a gaming laptop, don’t expect the same performance as a gaming laptop or desktop with a similar video card.
*We were sent a review unit of the Razer Core V2 with an NVIDIA GTX 1080 video card for the purposes of this review.
Last Updated on February 3, 2021.