So you’ve decided to give OS X Yosemite Beta a go and so far you’re loving it but there’s one minor problem: your VPN no longer works. That seems to be the case for several people I’ve run into and the good news is there is a work around (not guaranteed for all). This method has only been tested on Private Internet Access and works flawlessly. If you decide to try this method on a different VPN please let us know in the comments which VPN and if it worked or didn’t work.
The bad news, because Yosemite is in beta your VPN may or may not support it. This is typical for anything that’s in beta so it’s no fault of your VPN. The good news, OS X comes with a built in VPN client so using the built in client with your VPN providers settings should get you around their block on Yosemite. Let’s take a look on how to set this up.
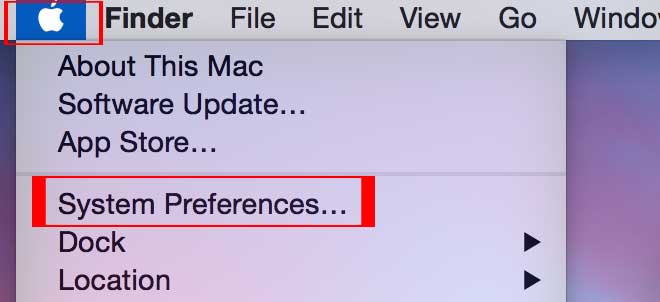
First you need to click the Apple icon top left and navigate down to System Preferences.
Once inside System Preferences navigate to Network.

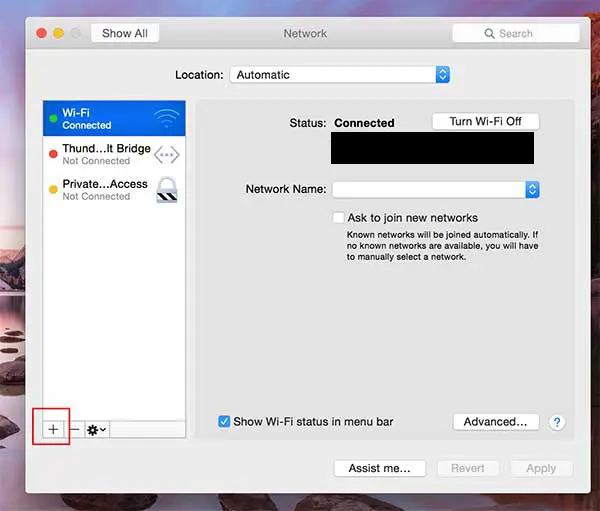
Once inside Network head down to the bottom left pane and click the + button to add a network. You may have to input your admin password at this point, or you may have a lock you have to click to gain access to these settings.
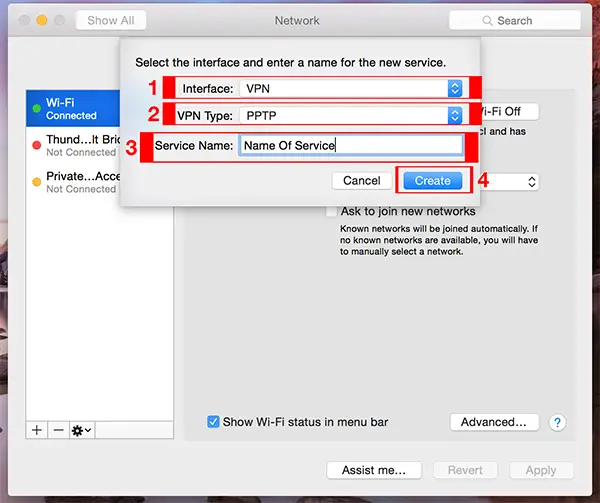
Once you click the + button you will be presented with another window, here you will choose the Interface (VPN) from the dropdown and the VPN type (PPTP for mine) and lastly the name of your service. Then Click Create.
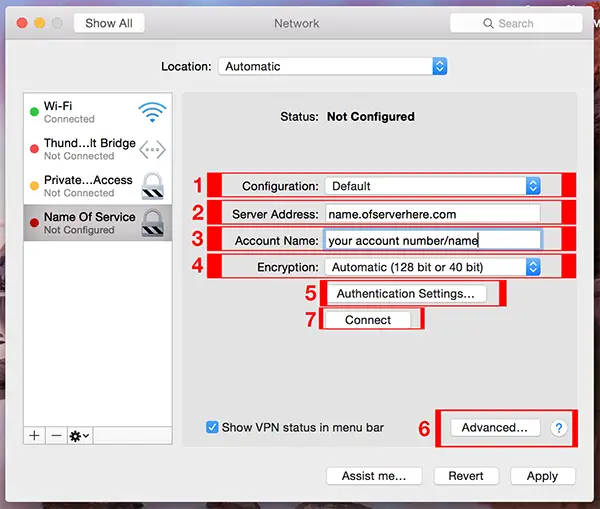
Once created you’ll be presented with a new screen that requires four fields of information.
- Configuration – Stays Default
- Server Address – The address of your VPN server
- Account Name – The account number or name your VPN service has given you
- Encryption – Set this to Automatic (128 bit or 40 bit)
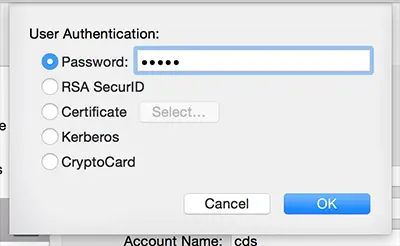
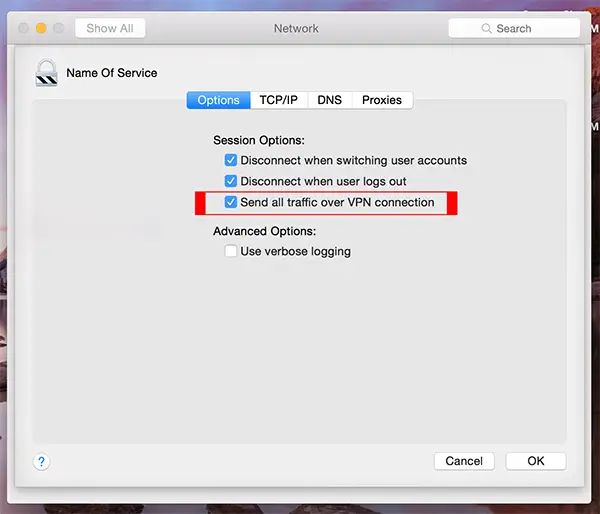
After all that is entered click Authentication Settings and you’ll get another windows where you can enter the password your VPN provided to you. Click OK to accept password then click Advanced Settings and make sure that the box next to “Send all traffic over VPN connection” is checked. Click OK and the you’re ready to click connect. That should wrap it up, your VPN service should start working in Yosemite Beta using OS X built in VPN client.
This method is not guaranteed to work for all VPN’s and was only tested on the one. Please let us know in the comments below if this works for you or doesn’t. Or if you have a better method or a method that works with other VPN services please do share. Hope this helps someone out there.
Last Updated on December 20, 2018.




Comments are closed.