
Wireless gaming peripherals aren’t really all that new. However, most of them require AA or AAA batteries, plugging in, or a proprietary charging dock to recharge. While the HyperX Pulsefire Dart wireless gaming mouse also requires recharging, it does so via a technology you likely have on hand — a Qi charging pad. On that note, our HyperX Pulsefire Dart review takes a look at a Qi Certified wireless gaming mouse with decent battery life and gaming-specific features.
Specifications
The HyperX Pulsefire Dart has the following features and specifications:
- Gaming-grade wireless technology
- Long-lasting battery life
- Qi Certified for wireless charging
- Premium Pixart 3389 Sensor
- Ergonomic shape with padded leatherette grips
- Split button design
- Advanced customization with HyperX NGENUITY Software
- USB wireless adapter included for PC desktop setups
| Sensor | Pixart PMW3389 |
| Resolution | Up to 16000 DPI |
| DPI Presets | 800/1600/3200 DPI |
| Speed | 450ips |
| Acceleration | 50G |
| Buttons | 6 |
| Left/Right buttons switches | Omron |
| Left/Right buttons durability | 50 million clicks |
| Light effects | Per-LED RGB lighting |
| Onboard memory | 1 profile |
| Connection type | 2.4GHz wireless / wired |
| Battery life | • 90 hours – LED off • 50 hours – Default LED Lighting |
| Charging type | Wireless Qi charging/wired |
| Polling rate | 1000Hz |
| Cable type | Detachable charging/data cable |
| Weight (without cable) | 110g |
| Weight (with cable) | 150g |
| Dimensions | Length: 124.8mm Height: 43.6mm Width: 73.9mm Cable length: 1.8m |
What’s in the box
- HyperX Pulsefire Dart Qi Certified wireless gaming mouse
- USB receiver
- USB cable adapter
- USB-C to USB-A extension cable
- Quick Start Guide

Design
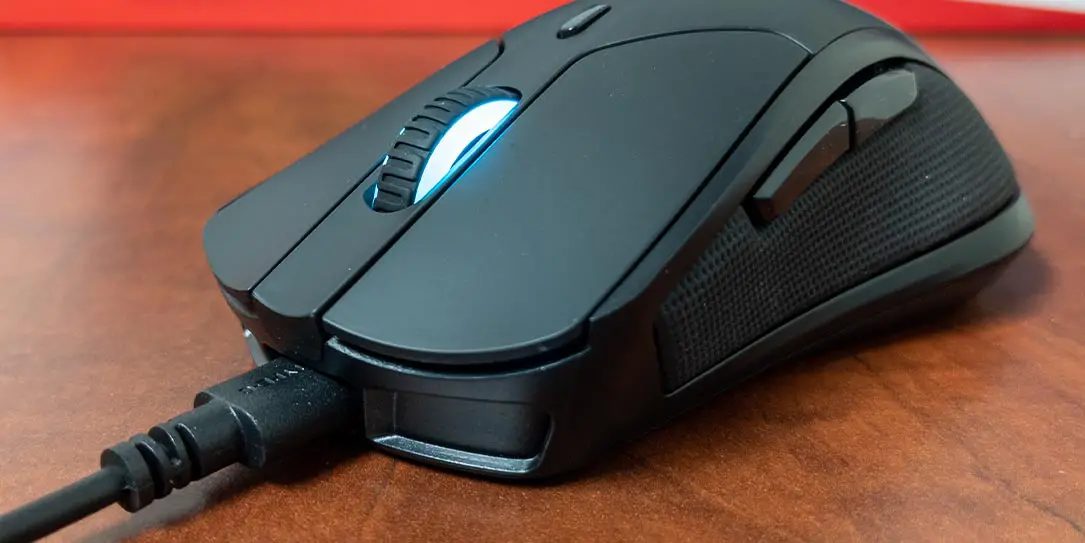
The HyperX Pulsefire Dart wireless gaming mouse is pretty standard fare at a first glance. the top has a left and right button with a mouse wheel centered between the two. Just below the mouse wheel is the DPI button which lets you toggle between three presets. Centered on the palm rest area is the HyperX logo.
The front of the mouse has a USB Type-C port for when you want to use it in wired mode or to connect to the cable for recharging should you not have a Qi wireless charging pad. The bottom has three mouse skates — two smaller ones near the front and one larger one at the back. The power switch and optical gaming sensor can also be found on the bottom. Not visible on the bottom, near the back of the mouse, is the built-in wireless charging receiver module.
The sides of the Pulsefire Dart have a unique feature I haven’t seen personally on a gaming mouse before. Both the left and right sides have a nice padded leatherette grip. Not only do they feel nice, but they are very comfortable to grip. The left side of the mouse also has two programmable side buttons.

As far as LED lighting is concerned, the mouse wheel and the HyperX logo where your palm rests both light up. These can be configured in the HyperX NGENUITY software which we’ll talk about in a bit.
Also included is a small USB cable adapter. At first, you might wonder what this small disc with a USB Type-C and USB-A port in it is for. If you’re using a desktop computer, this disc lets you plug the cable into your computer and then into the disc. You can then plug the USB receiver into the disc and place it closer to your mouse for a better signal.
The Pulsefire Dart is a pretty comfortable mouse to use, especially without a cable attached. The padded leatherette grips add a fair amount of comfort as well.
Ease of Use
The HyperX Pulsefire Dart can be used in a couple of ways. You can plug it into your computer using the included USB Type-C to USB-A cable. But then you’d be defeating the wireless aspect of the mouse. The second is to plug the USB receiver into a USB-A port on your computer. As mentioned above, if your computer is a fair distance from your mouse, you’ll want to use the included cable and USB cable adapter for a better connection. After turning the mouse on, the two should connect and you’re good to go.
While you can use the mouse straight out of the box like this, you’ll want to download the HyperX NGENUITY software to get the most out of the mouse. If you choose not to, the DPI button lets you toggle between 800/1600/3200 DPI and the side buttons are pre-programmed to forward and back click functions.
Software
The HyperX NGENUITY software is available for download and lets you further configure the HyperX Pulsefire Dart wireless gaming mouse. Installation is straightforward, you actually get it from the Microsoft Store once you select the appropriate device on the HyperX software page. Once installed, the software will automatically discover your mouse as long as it’s turned on or connected via the cable.

Once you select “Mouse” on the left hand side, the main page will display the Lights options. This page lets you select the colors, effects, and where you want the LED lights to be active.
The next tab lets you program the buttons on the mouse. You can program a keyboard, mouse, multimedia function, or macro to the side buttons, mouse wheel, and DPI button. The left and right mouse click buttons can be programmed as well but only to left or right clicks meaning you can swap them if you wish.
Finally, the last page lets you adjust the three saved DPI settings. You can set these to between 200 and 16000 DPI, as well as assign a color to them. This color will display briefly on the mouse’s LED buttons to let you know you’ve changed the DPI successfully. You can also add two more setting options for a total of five.
The top right corner of the interface always displays the remaining battery life and quick access to LED brightness, polling rate, and color presets.
If a firmware update is available, the software will tell you. In order to update the firmware, you will have to plug the mouse in physically via USB.
One thing to note. The settings, unfortunately, do not get saved on the mouse so you will need the NGENUITY software running on whatever computer you are using the mouse with. If you are moving between computers, you will have to set it up twice with your desired customizations as there is no way to transfer them over.


Performance
With any gaming mouse — wired or wireless — performance is key. There’s nothing worse than having a poorly responding mouse while playing Call of Duty or any other game for that matter. On that note, with its Pixart PMW3389 optical gaming sensor and customizable polling rate and DPI, the HyperX Pulsefire Dart performs quite well.
I mostly play games like Heroes of the Storm and Diablo III on my PC and the Pulsefire Dart worked very well at UWQHD resolutions and 1600 DPI with the polling rate set to 1000Hz. During gameplay, I didn’t notice any lag or differences between the wired mice I’ve been using. I did fire up Overwatch as well and, even though I still suck at it, I didn’t suck any worse (nor do any better) than with a wired gaming mouse.
As I hate swapping between mice, I used this as my daily driver for the review period. I programmed a couple of macros (copy and paste) to the side buttons. One thing I did notice is that there is a slight delay — barely half a second — before the macro triggered. It’s minor but it is there and noticeable.
Another performance “issue” that took me a bit to figure out is related to the distance the mouse is from the USB receiver. I had to send my laptop in for repair so I’ve been using a different one. Because it has no USB-A ports, I’ve been using a USB Type-C hub and had the Pulsefire Dart USB Receiver plugged into that. The way my setup was, however, placed the USB hub behind the laptop. While the mouse continued to work, there was the odd time where it would seriously lag. At first, I thought maybe it was the hub but then read about the recommended 20cm or less distance from the mouse. I plugged the included cable and the USB receiver into the round USB cable adapter. I positioned it so it was closer to the mouse and all the lag issues disappeared.
Battery Life
HyperX claims a battery life of up to 50 hours with the LED lighting on. Using it all day five days a week, I was able to go the entire week without having to recharge it, as long as I remembered to turn the mouse off at the end of the day.
When the battery hits the low battery warning, the mouse wheel LEDs pulse red to let you know it needs recharging. If you don’t already have a Qi wireless charger, the HyperX ChargePlay Base lets you charge the Pulsefire Dart and another device, like your Qi-compatible phone, at the same time. To charge the mouse, you’ll want to place it with the palm rest area centered over the Qi charger you’re using in order for it to charge. You’ll know it’s charging as the LEDs will breathe white while charging and turn off when it’s fully charged (or incorrectly placed and not charging).

When depleted, it takes roughly 2 hours to fully recharge from 0-100%. This is true of both wired and Chargeplay Base Qi-enabled charging.
Price/Value
Like their wired counterparts, wireless gaming mice run the gamut when it comes to price. With an MSRP of US$99.99, the HyperX Pulsefire Dart is a bit on the mid-high range price-wise. Fortunately, it is on sale at Amazon as of the time of this review for $79.99, which is a much better deal. However, if you don’t already have a Qi wireless charging pad, you’re going to have to factor that into the price if you want to take full advantage of the Qi wireless capabilities of this mouse.


Wrap-up
If you’re looking for a wireless gaming mouse, the HyperX Pulsefire Dart performs well enough for gaming. Additionally, it has the bonus of being Qi-compatible so if you have a Qi wireless charging pad, you can easily recharge it with that.
In some of our articles and especially in our reviews, you will find Amazon or other affiliate links. As Amazon Associates, we earn from qualifying purchases. Any other purchases you make through these links often result in a small amount being earned for the site and/or our writers. Techaeris often covers brand press releases. Doing this does not constitute an endorsement of any product or service by Techaeris. We provide the press release information for our audience to be informed and make their own decision on a purchase or not. Only our reviews are an endorsement or lack thereof. For more information, you can read our full disclaimer.
Last Updated on February 3, 2021.