Home theatre projectors have been around for years and are only getting better. Traditionally, you’d have to mount them on your ceiling at a distance to get a larger picture. Over the past few years, UST (ultra-short throw) projectors have gained in popularity. This is because they can sit closer to your wall on a stand. However, they are quite a bit pricier than other alternatives.
Estimated reading time: 0 minutes
Our BenQ V7050i review looks at a 4K UHD HDR-Pro ultra-short throw projector with Android TV support, CinematicColor, and more — at a more affordable price point. Read on for our full review!
Table of contents
Specifications
The BenQ 7050i 4K Laser TV Projectorwe reviewed has the following features and specifications:
| Projection system | DLP |
| DMD size | 0.47″ ECD |
| Native resolution | 4K UHD (3840×2160) |
| Native aspect ratio | 16:9 |
| Brightness (ANSI lumens) | 2500 |
| Contrast ratio | 2,000,000:1 (w/ Lightsource Dimming) |
| Selectable aspect ratio | 16:9, 4:3, Auto, Real |
| Display colour | 30-bit (1.07 billion colours) |
| Light source | Laser |
| Light source wattage | 152W |
| Light source life | 20,000 hours |
| Throw ratio | 0.252 |
| Zoom ratio | Fixed |
| Lens | F=2.0, f=2.45mm |
| Projection offset (full-height) | 149% |
| Keystone adjustment | 1D, Vertical ± 30 degrees |
| ANSI uniformity (min) | -40% |
| Clear image size | 70″ ~ 123″ |
| Picture modes | 3D, Bright, Bright Cinema, DCI-P3, FILMMAKER MODE, FILMMAKER MODE HDR, HDR10, HLG, Silence, User 1 |
| Colour wheel segment (SSI) | RGBRGB |
| Colour wheel speed | 2x (50Hz, 60Hz), 3D (120Hz) |
| Rec.709 coverage | 96% |
| DCI-P3 coverage | 98% |
| Input lag | 83.34ms (1080p @ 60Hz) |
| Resolution support | VGA (640 x 480) to 4K UHD (3840 x 2160) |
| Horizontal frequency | 15K~135KHz |
| Vertical scan rate | 23~120Hz |
| HDTV compatibility | 1080i, 1080p, 2160p, 720p |
| 3D compatibility | Frame Packing (Blu-ray), Side by Side (Streaming), Top Bottom (Streaming) |
| I/O interface | • HDMI-1(2.0b/HDCP2.2),HDMI-2 (2.0b/HDCP2.2) • USB Type A-1 (2.0/Power Supply 1.5A), USB Type A-2 (3.0/Power Supply 1.0A), USB Type A-3 (2.0/Power Supply 2.5A) • RS232 in (DB-9 pin) • Audio in (3.5mm mini jack) |
| Speaker | 2x 5W chamber powered by treVolo |
| Audio L/R switch | Yes |
| HDMI audio return | Yes, ARC, 2-channel |
| Typical power consumption (110V) | 480W |
| Stand-by power consumption | <0.5W |
| Acoustic noise (typical/Eco) | 34/29 dB |
| OSD language | 28 languages |
| OS | Built-in, Android 9.0 |
| ROM/RAM | 16GB/2GB |
| Wireless connectivity | Bluetooth 4.2, Wi-Fi 802.11 a/b/g/n/ac 2.4G/5G, Google Cast |
| Dimensions | 500 x 157 x 388mm (19.75 x 6.18 x 15.2″) |
| Weight | 9.9kg (22lb) |
What’s in the box
- BenQ 7050i 4K Laser TV Projector
- BenQ QS01 HDMI Media Streaming stick
- BenQ projector remote
- BenQ QS01 remote
- 4x AAA batteries
- Power cable
- MicroUSB to USB-A cable
- Quick Start Guide
- Regulatory Statements
- Projector Installation Guide QR Code
- 3-year Warranty

Design
For the most part, ultra-short throw laser projectors are a bit bulkier than their longer throw counterparts. The BenQ V7050i is no exception. It is 19 3/4″ wide, just under 15 1/4″ deep and just under 6 1/4″ in height (with the feet full retracted). The projector is a dark grey in colour, which fits nicely with most other components you may have in your home theatre stand. The top of the projector has a power button on the lower right and the words “Superior Sound by treVolo” in the lower left corner. A 9 1/4″ x 7 1/2″ cover sits slightly off-centred towards the back of the projector with the 4K HDR logo on it. When pressing the power button on the projector or the included remote, the cover slides back, exposing the laser components inside. The cover is an excellent idea as it prevents dust from collecting on the lens when not in use.
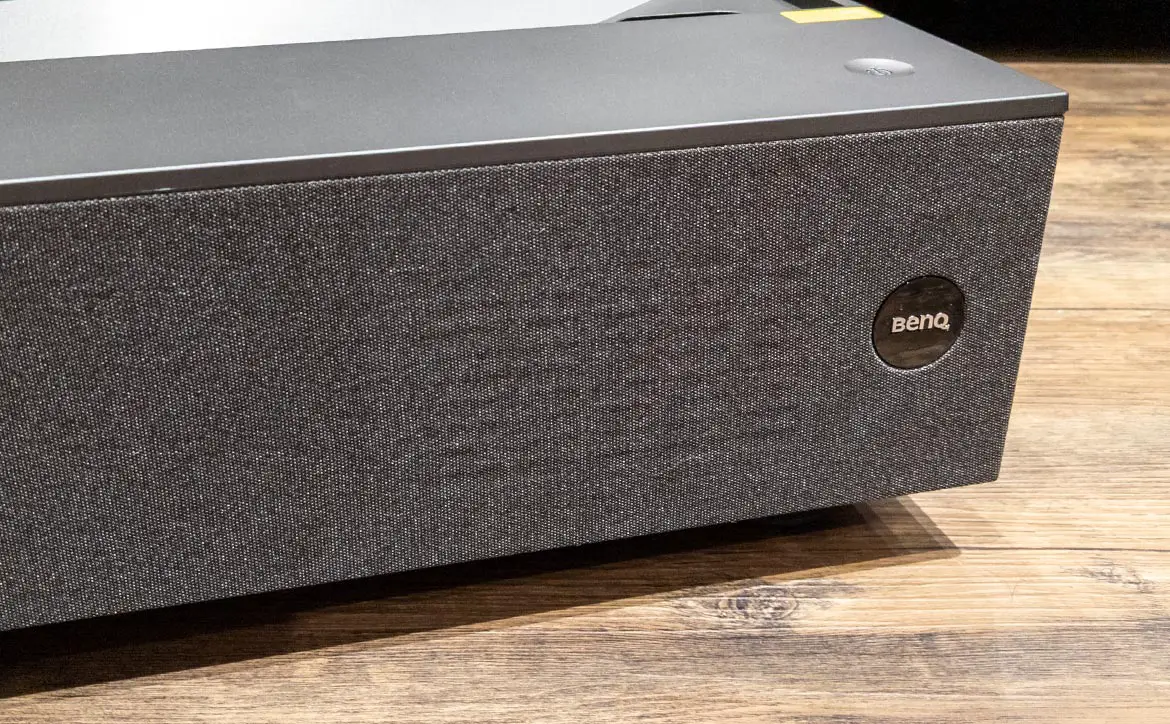
The left and right sides of the projector have grille vents for airflow. Also grey in colour, they have a blue accent strip running horizontally down the middle for a touch of colour. The right side also has two USB-A ports near the back, one for powering the QS01 Android TV dongle. The front of the projector is where the two 5W Trevolo speakers are located. A thin grey cloth covers them, giving the projector a nice look. The BenQ logo sits on the far right, set inside a black gloss circle.
The back of the projector is where you’ll find the ports. From left to right (when looking at the projector), you’ll find the HDMI with audio return port, a second HDMI port with a sticker indicating this is for the QS01 Android TV dongle, a USB-A port, RS-232 port, and SPDIF port. The standard power port is located near the bottom, off-centred slightly towards the left. There are also two small buttons located on each side near the bottom. When they are loosened from below, pressing the button releases a distance guide. These guides can then be pulled out and set to 80, 90, 100, and 120 screen sizes, tightened, and then used to assist with properly placing the projector the correct distance from the wall.
The bottom of the projector has a few more grilles for ventilation and four adjustable feet — one in each corner — to help straighten the image during setup. There are four standard mounting holes if you do wish to ceiling mount it. You’ll want to make sure you have a strong mount and mount it onto a beam as the projector weighs in at a hefty 22 pounds.

Overall, the projector looks very nice. I appreciate the darker grey colour, allowing it to fit seamlessly with my receiver, Xbox Series X, speakers, and other home theatre components.
A couple of things to note about the design. First off, it only has two HDMI ports, one of which is for the QS01 dongle. Granted, you can use it for another input like a Chromecast or other device, but in this day and age, it’d be nice to have at least three HDMI ports. In addition, there is no Ethernet port on this projector, so you’ll have to have a solid Wi-Fi signal where you plan on setting the projector up.
Finally, while we haven’t gotten into the setup yet, the QS01 dongle sticks out the back of the projector. With every other BenQ model I’ve tested to date, the QS01 is tucked away inside a compartment within the projector. Not only does the dongle stick out, but the power cable for it wraps around the side and plugs into a side USB-A port. It works, but if you’re looking for a clean look, this detracts from that, especially if you are ceiling mounting it. You might be wondering why BenQ uses a dongle instead of embedding Android TV on the projector itself. I recently inquired about this and was told it is for future-proofing. In other words, if you need to down the road, you can get a new dongle and still be up to date with whatever Android TV (or other) OS is current should the hardware requirements change.
The projector also has two remotes: the primary remote and a second smaller remote for the QS01. The main remote is quite large, 9″ x 2″ x 3/4″ in dimension. The top 5″ is a dark grey colour while the bottom 4″ is a lighter, almost silver grey colour. Along the top is the power on button in the upper left and the power off button in the upper right. Below these buttons is a 3 x 2 grid with six more buttons. The top three are for Auto, Aspec, and Test Pattern, while the bottom three are blank. Below these buttons are Source and Default buttons. The familiar menu navigation with four arrow keys and the OK button centred in the middle is next. The left and right buttons also double as volume buttons. Below this is the Back and Menu buttons, followed by another 3 x 2 grid. The six buttons here are Pic Mode, HDR, Cinema Master, Movie Play, 3D, and Invert buttons. There are nine more buttons in the lighter grey section: Bright, Contrast, Dynamic Iris, COlor Temp, Color Manage, Light Mode, Gamma, Sharp, and Eco Blank. Finally, a key light button is conveniently placed on the upper left side of the remote to turn the remote backlight on while in a darker environment.

In addition to the regular BenQ projector remote, a second Android TV remote controls the dongle. The remote has a microphone and LED indicator at the top. Beneath this are six buttons: Power, Focus, Keystone correction, Kids TV, Source, and Amazon Prime Video. A typical round navigation disc with an OK button in the middle is below those. Six more buttons are below the disc and let you go back, quickly access the Android TV home screen, access the Android TV settings menu, mute, voice search, and finally, open the projector menu. Last but not least is a stacked volume control button for raising or lowering the volume. The remote itself is pretty slim, about 6-inches by 1 3/4-inches, by just over 1/2-inch thick.
Setup
While setting up the projector is easy enough, it is a bit time-consuming and takes roughly 20-30 minutes. The following steps are involved when setting up the projector:
- Scanned QR Code to access the installation guide – however, it went to a 404 page
- Remove the blue tape from the projector lens cover
- Remove the rubber strips from each side of the projector lens cover
- Remove the plastic coating from the top of the projector lens cover
- Plug the BenQ QS01 HDMI Streaming Media Stick into the HDMI 1 port
- Plug the MicroUSB cable into the QS01 stick and the USB-A end into the USB port marked BenQ Dongle
- Loosen the distance stick holders and press in against the sticks to let them pop out
- Pull the sticks to your required distance and tighten
- Place the projector on your entertainment stand at the desired distance
- Plug in your A/V receiver to the HDMI 2/Audio Return Port
- Plug your optical audio into the SPDIF port (optional)
- Put two AAA batteries into each remote
- Plug in the projector to your power bar
- Turn on projector and select front or rear projection, press OK on main remote
- Select OSD language (28 languages available)
- Adjust keystone, hold OK for 2 seconds for auto, press back for 2 seconds to reset
- Enable or disalbe auto source
- Press and hold OK on small white remote for 5 seconds to pair with QS01 device
- Select language
- Continue quick setup with your smartphone
- Open Google app, say “OK Google, set up my device”
- Confirm code matches between phone and screen
- Select your Wi-Fi network on your Android phone
- Copy your Google account to the QS01
- Sign into your Google account on your phone
- Accept the TOS on the QS01
- Enable or disable location services on the QS01
- Enable or disable Android troubleshooting
- Enable Google Assistant
- Enable or disable personal results
- Choose a name for the QS01 device
- Choose which apps to install (except Netflix, more on that later)
- Walk through basic Android TV features
- Agree or disagree to anonymous BenQ data collection
Once set up, you are good to go. One thing I did notice, however, is that it does sit further back than other UST projectors that I’ve tested in the past. Not by much, but still enough that I had to pull my entertainment stand back from the wall in order for a larger image to be displayed.
Display
The BenQ V7050i 4K UHD HDR projector uses a laser light source, 0.47″ ECD DMD chip, and an RGBRGB DLP colour wheel. It is pretty bright, at 2500 ANSI lumens, has a 2,000,000:1 contrast ratio when LightSource Dimming is enabled, and 30-bit (1.07 billion) colour. For the purists out there, it also has 96% Rec.709 and 98% DCI-P3 coverage.
The first thing I noticed when enabling the test pattern grid during setup is that there is a slight curvature at the top left and right corners, even after keystone correction. This isn’t uncommon with ultra-short throw projectors and is pretty minor. I have a black border around my screen, so it wasn’t noticeable once fully set up, but it is still worth mentioning.
As far as actual picture quality is concerned, the BenQ V7050i has a very nice picture with great colours. Sure, other projectors out there have a much more comprehensive colour gamut coverage, but they also cost almost twice as much. Honestly, unless you have one of these other projectors side by side, you won’t notice the difference. Movies, TV shows, and even games looked great colour-wise on this projector.
I first set up the projector using my older 1.0 gain grey 106″ projector screen. The colours looked just fine, as well as the crispness of the image. I am also set up in a basement with no ambient light reflecting on the screen from windows or while the lights are dimmed. I did find that the DCI-P3 mode looked a little dim, however. BenQ did also send over an Elite Screens Aeon CLR Series 100″ screen. Specifically for UST projectors, they absorb up to 95% of overhead lighting and offer a much greater contrast. While the image looked great on my screen, the Aeon CLR Series was night and day and only improved on the colours and contrast of the projector. Then again, it is also a US$1500 screen.

Depending on your setup, a more affordable screen may be the route for you until you can save up for a CLR screen. It really does make a difference, but on the other hand, a more affordable screen can work just fine as well.
Software/Ease of use
As mentioned above, the projector does come with two remotes. Oddly enough, either remote will control most functions, but neither will control every function. In other words, there are some things you can only access on the Android TV dongle with the smaller remote, and only some main projector functions you can quickly adjust with the main remote. For the most part, I stuck with using the larger remote.
As far as settings go, there is plenty to adjust. When accessing the menu, you can adjust the Picture Mode, Brightness, Contrast, Color, Tint, Sharpness, Gamma, Cinema Master, and Brillant Colour settings. The next tab lets you modify the Overscan Adjustment, HDR, and Silence modes. The third tab is your installation options, including Projector Position, Motor Focus, Test Pattern, Aspect Ratio, High Altitude Mode, Auto Keystone, and Keystone correction adjustments. Unfortunately, all you can manually adjust here is the vertical keystone. The following two tabs are more system setup tabs like language, background colour, source renaming, sound, and the like. Finally, the last tab is your information screen which displays the current source, picture mode, dynamic range, and much more.
Android TV
The BenQ V7050i QS01 dongle runs Android TV, currently version 9. When it first booted, it was running the older Android TV interface. However, after a few weeks, it did update to the newer Android TV interface, which looks a lot like the Google TV interface found on the new Chromecast.
The Home page displays new content from your installed streaming services. Across the top are options for Search, Home, Discover, and Apps. On the upper right are icons for Source, Battery, Settings, and the current Time. The settings section lets you configure your network, account, apps, projector settings, device settings, and pair remotes and other accessories like an external Bluetooth speaker.

As for apps, you can install almost any app that’s available in the Google Play Store. Almost. While Disney+, Plex, Prime Video, Spotify, and most others work just fine, the native Netflix app does not work as the device is unsupported on the QS01. If you don’t use Netflix, no big deal. If you do, as I do, then you’ll have to connect a laptop or use another solution like a Chromecast or game console to view Netflix on this projector. Sadly, casting from my Pixel 5 didn’t work either.
Pressing the Kids TV button on the remote launches the BenQ FamiLand app, which boasts secured content for kids. If you wish, you can download an iOS or Android app to your phone to add more channels, play videos, and share YouTube content to the FamiLand app. By default, there are about 30 channels with content including ABCKids, Nick Jr., nursery rhymes, Sesame Street, Peppa Pig, and more.
From Amazon Prime, Disney+, and Plex to casting from my device, I had no issues streaming (aside from Netflix) on the BenQ V7050i through the included dongle.
Performance
When powered on, it takes about a minute for the cover on the BenQ V7050i to open and an image to show on the screen. On the other hand, powering off took about 15-20 seconds. During operation, the projector is quiet as well. At its brightest mode, the acoustic noise is only 34dB. In addition, it seems even quieter because you are not sitting under the projector as in a typical setup.
Sound Quality
The BenQ V705i has two 5W speakers powered by treVolo. With a total of 10W, the projector does get quite loud at maximum volume. I found that a setting of 17 or 18 (out of 50) was more than adequate to fill my basement. As loud and crisp as the volume gets, however, the projector lacks the bass side. The bass that does come through is punchy but not warm and full as it should be. While the sound is adequate and great for temporary setups or small spaces like apartments, you’ll still want to make use of a complete surround sound home theatre system for optimal sound quality.
Price/Value
While an MSRP of US$3499 isn’t exactly affordable to most, it is much more affordable than the $5000 or more that other ultra-short throw projectors run. Given the picture quality and feature set of the BenQ V7050i 4K laser TV projector, it is a pretty affordable option compared to other 4K UST projectors available on the market.
Photo Gallery


Wrap-up
If you’re looking for a 4K UHD HDR projector and are short on space, the BenQ V7050i smart projector is a pretty solid choice, especially considering you’ll be saving yourself some money in the process compared to some of the other options out there.
In some of our articles and especially in our reviews, you will find Amazon or other affiliate links. As Amazon Associates, we earn from qualifying purchases. Any other purchases you make through these links often result in a small amount being earned for the site and/or our writers. Techaeris often covers brand press releases. Doing this does not constitute an endorsement of any product or service by Techaeris. We provide the press release information for our audience to be informed and make their own decision on a purchase or not. Only our reviews are an endorsement or lack thereof. For more information, you can read our full disclaimer.
Last Updated on September 16, 2022.